Today I started working with Nifty GUI. Indeed this GUI system is nifty, but it took me nearly 6 hours to get to work correctly! It turns out it was working for a little bit, and I had a very simple error in the screen.xml file, but it wasn't exactly obvious for awhile.
Why am I starting with the GUI? The GUI isn't the greatest starting point when you have nearly 0 idea of how to make a game, but to me it makes sense. With the GUI I have a logical point to implement any features I want, and they can easily be contained in their own areas. When I want to work on a level, all I need to do is add a button to the Main Menu and boom, there I am at the level I was working on. Of course the GUI relies on all of the basics of programming that I haven't actually talked about yet;objects, classes, fields, methods. Find out how to use those with Java's Documentation.
It's ok if you don't know what each piece of code means at this point, I'll do my best to fill you in.
So first, a little bit about Nifty GUI. Nifty runs via what are called "Screens". Your start menu would be 1 screen, your HUD would be another, your pause menu would be a third, etc.


These layers can be divided into sections called "Panels". Panels cannot over-lap. Panels CAN contain more panels, which are divided into smaller panels.

These 3 concepts are the easy part and are explained moderately well here.
Now onto the actual code behind the NiftyGUI. I will show you how I achieved the simple Gui below.

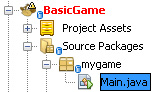
First you will need a Main class for your project, if you start a new project this should be located at "BasicGame/Source Packages/mygame/Main.Java" and looks like this:

package mygame;

import com.jme3.app.SimpleApplication;
import com.jme3.material.Material;
import com.jme3.math.ColorRGBA;
import com.jme3.math.Vector3f;
import com.jme3.renderer.RenderManager;
import com.jme3.scene.Geometry;
import com.jme3.scene.shape.Box;

public class Main extends SimpleApplication {

    public static void main(String[] args) {
        Main app = new Main();
        app.start();
    }

    @Override
    public void simpleInitApp() {
        Box b = new Box(Vector3f.ZERO, 1, 1, 1);
        Geometry geom = new Geometry("Box", b);

        Material mat = new Material(assetManager, "Common/MatDefs/Misc/Unshaded.j3md");
        mat.setColor("Color", ColorRGBA.Blue);
        geom.setMaterial(mat);

        rootNode.attachChild(geom);

    }

    @Override
    public void simpleUpdate(float tpf) {

    }

    @Override
    public void simpleRender(RenderManager rm) {

    }
}
Now we need to add a couple lines to this file to make it ready for Nifty.
First we need to import Nifty's packages, com.jme3.niftygui.NiftyJmeDisplay and import de.lessvoid.nifty.Nifty.
Next we need a new NiftyJMEDisplay object, we'll name it niftyDisplay. We also need a new Nifty object, named nifty (keep it simple).
last we add the Nifty to our GUIViewport,
package mygame;

import com.jme3.app.SimpleApplication;
import com.jme3.material.Material;
import com.jme3.math.ColorRGBA;
import com.jme3.math.Vector3f;
import com.jme3.niftygui.NiftyJmeDisplay;
import com.jme3.renderer.RenderManager;
import com.jme3.scene.Geometry;
import com.jme3.scene.shape.Box;
import de.lessvoid.nifty.Nifty;

public class Main extends SimpleApplication {

    public static void main(String[] args) {
        Main app = new Main();
        app.start();
    }

    @Override
    public void simpleInitApp() {
        Box b = new Box(Vector3f.ZERO, 1, 1, 1);
        Geometry geom = new Geometry("Box", b);

        Material mat = new Material(assetManager, "Common/MatDefs/Misc/Unshaded.j3md");
        mat.setColor("Color", ColorRGBA.Blue);
        geom.setMaterial(mat);

        rootNode.attachChild(geom);

        NiftyJmeDisplay niftyDisplay = new NiftyJmeDisplay(assetManager, inputManager, audioRenderer, guiViewPort);
        Nifty nifty = niftyDisplay.getNifty();
        guiViewPort.addProcessor(niftyDisplay);

        //nifty.setDebugOptionPanelColors(true); //un-comment this line to use DebugPanelColors and make sure Nifty is running correctly.

        flyCam.setDragToRotate(true); //detaches camera from mouse unless you click/drag.
    }

    @Override
    public void simpleUpdate(float tpf) {
        //TODO: add update code
    }

    @Override
    public void simpleRender(RenderManager rm) {
        //TODO: add render code
    }
}
If you were to run Main now, you'd probably be upset because nothing has changed. Don't worry, we're about 1/3 of the way finished.
The next part to Nifty is a controller class. To keep our project nice and clean looking let's put this controller class in a new package called mygame.GUI. You typically have a couple controllers for the GUI so in the future we'll put them here.
Right click mygame package, new, other, java, java package rename to GUI click ok.
Right click your new GUI package, new, javaclass, rename it to MainMenuController and click ok.
Go ahead and copy/paste the following code while I tell you what everything is doing.

First we need to extend our MainMenuController via AbstractAppState. This allows us to use our mainmenugui to change the active appstate (we'll be doing this later for switching game modes).
You also need to implement the ScreenController to allow Nifty to do it's thing.
Next we need some private fields so we can access App, AppStateManager,Nifty and a Screen.
Nifty requires OnStartScreen() and OnEndScreen() to function.
Now that the screen controller is created, we need a niftygui layout. You can do these through Java to implement dynamic GUIs, but I haven't gotten that far yet (remember, I'm learning to?) so let's hit up the XML format instead!
Go to ProjectAssets/Interface, right click and go to new, other, XML, xmlDocument, rename it to "MainMenuLayout", make it well-formed and click ok. Go ahead and replace all the contents inside your new document with what is below.

You'll notice the schema location, make sure you include that with your file so the xml editor automatically helps you out while you're on your way!
package mygame.GUI;

import com.jme3.app.Application;
import com.jme3.app.state.AbstractAppState;
import com.jme3.app.state.AppStateManager;
import de.lessvoid.nifty.Nifty;
import de.lessvoid.nifty.screen.Screen;
import de.lessvoid.nifty.screen.ScreenController;

public class MainMenuController extends AbstractAppState implements ScreenController {

  private Application app;
  private AppStateManager stateManager;
  private Nifty nifty;
  private Screen screen;

  public MainMenuController() {

  }

  public void bind(Nifty nifty, Screen screen) {
        this.nifty = nifty;
        this.screen = screen;
  }

    public void onStartScreen() {
  }

    public void onEndScreen() {
  }

  @Override
  public void initialize(AppStateManager stateManager, Application app) {
    this.app = app;
    this.stateManager = stateManager;
  }
}
You also need to implement the ScreenController to allow Nifty to do it's thing.
Next we need some private fields so we can access App, AppStateManager,Nifty and a Screen.
Nifty requires OnStartScreen() and OnEndScreen() to function.
Now that the screen controller is created, we need a niftygui layout. You can do these through Java to implement dynamic GUIs, but I haven't gotten that far yet (remember, I'm learning to?) so let's hit up the XML format instead!
Go to ProjectAssets/Interface, right click and go to new, other, XML, xmlDocument, rename it to "MainMenuLayout", make it well-formed and click ok. Go ahead and replace all the contents inside your new document with what is below.
<?xml version="1.0" encoding="UTF-8"?>

<nifty xmlns="http://nifty-gui.sourceforge.net/nifty.xsd" xmlns:xsi="http://www.w3.org/2001/XMLSchema-instance"
       xsi:schemaLocation="http://nifty-gui.sourceforge.net/nifty.xsd http://nifty-gui.sourceforge.net/nifty.xsd">

    <useStyles filename="nifty-default-styles.xml" />
    <useControls filename="nifty-default-controls.xml" />


</nifty>
As stated above, Nifty relies on individual screens to contain content. To create a new screen enter the lines below.
<?xml version="1.0" encoding="UTF-8"?>

<nifty xmlns="http://nifty-gui.sourceforge.net/nifty.xsd" xmlns:xsi="http://www.w3.org/2001/XMLSchema-instance"
       xsi:schemaLocation="http://nifty-gui.sourceforge.net/nifty.xsd http://nifty-gui.sourceforge.net/nifty.xsd">

    <useStyles filename="nifty-default-styles.xml" />
    <useControls filename="nifty-default-controls.xml" />

    <screen id="start" controller="mygame.GUI.MainMenuController">

    </screen>
</nifty>
Make sure you're pointer is pointing to the correct package with your MainMenuController in it, it's Case Sensitive.
Each screen contains several layers which can be used to over-lay panels, we only need 1 layer for now.
    <screen id="start" controller="mygame.GUI.MainMenuController">

        <layer id="foreground" childLayout="center">


        </layer>

    </screen>
Notice the childLayout field? This is how the panels will be aligned inside this layer, you can use "vertical" (panels will start flush against the top of the screen) or "horizontal" (panels will start flush against the left side of the screen) or "center" (panels are centered) I personally like centered for now, it might change depending on the over-all look of our main menu later.
Next we need to create some panels. Remember, panels cannot over-lap one another, but they CAN contain additional panels, so lets make 1 large panel to center everything which will have 3 smaller panels inside of it to be used as buttons.
    <screen id="start" controller="mygame.GUI.MainMenuController">

        <layer id="foreground" childLayout="center">

            <panel id="panel_background" width = "50%" height="80%"  childLayout="vertical">

                <panel id="panel_top" backgroundColor="#ff0000ff" width="*" height="33%" childLayout="center">


                </panel>

                <panel id="panel_middle" backgroundColor="#1240abff" width="*" height="33%" childLayout="center">


                </panel>

                <panel id="panel_bottom" backgroundColor="#ffff00ff" width="*" height="*" childLayout="center">


                </panel>

            </panel>

        </layer>

    </screen>
All elements except the screen can contain color information in the form of backgroundColor. This is a hex code with 2 additional characters (00-FF) that represent opacity, FF = 100%.
Elements where you define a size in percentage can use "*" to indicate the remaining amount, in this case it is used to represent 100% width and the remaining 33% height.
Now we are almost finished, we have our screen layout defined inside an xml document, we have our screen controller, we're just missing 1 line of code to attach these to our Main class.
package mygame;


import com.jme3.app.SimpleApplication;

import com.jme3.material.Material;

import com.jme3.math.ColorRGBA;

import com.jme3.math.Vector3f;

import com.jme3.niftygui.NiftyJmeDisplay;

import com.jme3.renderer.RenderManager;

import com.jme3.scene.Geometry;

import com.jme3.scene.shape.Box;

import de.lessvoid.nifty.Nifty;

import mygame.GUI.MainMenuController;


public class Main extends SimpleApplication {


    private MainMenuController myMainMenuController;


    public static void main(String[] args) {

        Main app = new Main();

        app.start();

    }


    @Override

    public void simpleInitApp() {

        Box b = new Box(Vector3f.ZERO, 1, 1, 1);

        Geometry geom = new Geometry("Box", b);


        Material mat = new Material(assetManager, "Common/MatDefs/Misc/Unshaded.j3md");

        mat.setColor("Color", ColorRGBA.Blue);

        geom.setMaterial(mat);


        rootNode.attachChild(geom);


        myMainMenuController = new MainMenuController();

        stateManager.attach(myMainMenuController);


        NiftyJmeDisplay niftyDisplay = new NiftyJmeDisplay(assetManager, inputManager, audioRenderer, guiViewPort);

        Nifty nifty = niftyDisplay.getNifty();

        guiViewPort.addProcessor(niftyDisplay);

        nifty.fromXml("Interface/MainMenuLayout.xml", "start", myMainMenuController);

        //nifty.setDebugOptionPanelColors(true);


        flyCam.setDragToRotate(true);

    }


    @Override

    public void simpleUpdate(float tpf) {


    }


    @Override

    public void simpleRender(RenderManager rm) {


    }

}
Make sure this is pointing towards your screen layout xml, the "start" screen inside the xml, and your nifty screen controller.
Now if you click run now you'll see an 3 ugly red, blue and yellow boxes. But these are the start to your own gui! The hard part is over, your gui is working, so now it's time to add functionality to it! Check out all available controls over here. I'll be back later with an in-depth look at these controls once I've learned more about them myself!
I hope this helped you get over any problems you had implementing a gui system into your jME3 project, or at the very least I helped you avoid the same headaches I went through.
Feel free to use ALL CODE above in your own projects, commercial or otherwise, without attribution! All of the code you see above was either written entirely by myself, or available through the jME sdk interface in some fashion. Most of the Nifty code was discovered or based on code found through their sourceforge wiki.
Veteran coders! If you see me doing something deliberately stupid, or perhaps just incorrect or maybe there's an easier way to do it, let me know in the comments! I write these articles to help other newbies over-come the same hurdles I had to, and any additional information or discussion is always welcome.
any good material to learn nifty gui
ReplyDeleteYour Tutorial is amazing. You brought together and finished what the JME3 tutorial did/could not. Keep it up.
ReplyDelete